Friday, February 22, 2013

Where to Find Shaped Pads That Fit

It can be difficult to find a shaped saddle pad for hunter or equitation classes that fits your saddle perfectly, showing an even border that isn't too narrow or too wide all the way around the saddle. Some companies make saddle pads in different shapes and sizes in order to help you find the best fit, so this post will give you an idea of the different companies that offer such options. If you can't shop for a pad in person to try it with your saddle before you buy, some companies can give you an idea of which model might work best with your brand and size of saddle if you contact them.

You might have noticed that I don't normally mention particular brands in this blog, mostly because I don't want to give anyone the impression that the myth of judges caring about brands holds any merit (as long as your clothing and equipment are well-fitted, clean and appropriate, the only people who might care about trends are your fellow competitors). In this case we are using brand names because correctly-fitting pads can be difficult to find and there aren't many companies that offer enough options to fit a variety of saddles. These companies aren't necessarily trendy; they're seen on the show grounds because they offer saddle pads that fit well.

If you know of a company that should be included in this list but isn't, either leave me a comment or send me an e-mail and I'll add it!

The approximate price ranges given here are in American dollars and could vary from store to store.

Price Guide
$ = under $40
$$ = $40 to $69.99
$$$ = $70 to $99.99
$$$$ = $100 or more

Wilker's: More shapes available than you would imagine, some even for particular brands, all in a wide variety of sizes.
Prices: $ to $$

Toklat: Several different styles with a couple of brand-specific options, each in a variety of sizes.
Prices: $$

Ecogold: Both forward and regular flaps in a variety of sizes, along with specialty pads.
Prices: $$$$

Ogilvy Equestrian: Great customer service, with different sizes offered and a memory foam option, but currently only available in sheepskin rather than synthetic fleece. Rumour has it that they will come out with a new synthetic fleece model at some point.
Prices: $$$$

Fleeceworks: A limited number of different shapes along with a small range of sizes, all in sheepskin.
Prices: $$$$


EquineLUX: Non-slip high-tech pads. Come in three sizes with a sizing chart to get an idea of the fit, and I'm told that they will also make customized pads to your saddle's measurements at no extra charge.
Prices: $$$$


Saturday, February 16, 2013

How to Dress for a Jumping Clinic

Clinics can be a fantastic way to get off the property while at the same time getting coaching from another set of eyes. Turning your horse out well for a clinic is a way of showing respect for the clinician, so this post will cover the ideal turnout for both informal and very formal clinics.

The best way to find out what is expected in terms of turnout for a particular clinic is to contact the organizer. If formal turnout is expected, they are likely to mention it at some point in the communication prior to the clinic. For most clinics, informal turnout should suffice as full formal turnout is usually only seen for a select few clinics with certain world-class clinicians.

Informal Turnout

My general rule of thumb is that the horse and rider shouldn't look out of place in a mid-week jumper class. That means that everything should be neat and tidy and fairly conservative, but without braiding or wearing a show jacket.


For warm-weather clinics, the rider should wear a tucked-in polo shirt, beige breeches (or breeches of a similarly light colour), belt, polished field boots and a helmet. Many riders will also wear gloves, and hair should be neatly contained as you would wear it at a show. If you must use paddock boots and half chaps instead of field boots, make sure that they are clean and polished.

In cooler weather, a fitted sweater can be added, and for even colder weather, a fitted jacket. Baggy clothing is not acceptable when the clinician needs to be able to see you ride! In extremely cold weather, the use of winter riding breeches or boots would certainly be understood even though these sometimes do not come in show colours or finishes. Riding in a clinic will usually warm you up quickly, so wearing layers that can easily be removed is ideal.

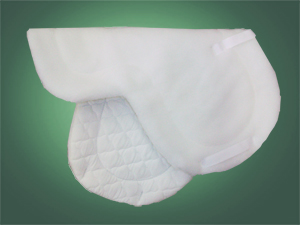
The horse should be as clean as possible, including any white markings. The mane should be neat and shortened (braid it over before the clinic if it tends to be messy) and the tail fully brushed out. The hooves can be oiled and the face and legs should be trimmed. In cold weather, a full show clip is not necessary. The saddle pad can be either square or shaped, but should be white, black or another conservative colour. The tack should all be just as clean as it would be for a horse show, and you can start with the set-up that you feel most comfortable in, aside from any devices like draw reins that do not belong at a clinic. Try to bring a few extra bits, spurs and martingales with you in case the clinician wishes for you to try something different. You should also carry a crop unless your horse cannot be ridden with one.

Formal Turnout

Formal turnout is essentially what you might show in on the weekend, adding in braiding and a show shirt and jacket. Again, this type of turnout is not common for jumping clinics (99.9% of the time you'll be fine with the informal turnout) so ask the organizer if you suspect that it might be expected.


Formal turnout should follow the same general rules as informal turnout except for braiding the mane and wearing a show jacket instead of a polo shirt . I would expect to see a hunter in a fitted pad with hunter braids while the jumper can wear a conservative square pad with either hunter or jumper braids.

The horse should also have a full body clip in cold weather for this sort of clinic. The odds are that if the horse is entered in such a high-level clinic, it will be worked hard enough at home to warrant the full clip, anyway.


Monday, February 11, 2013

How to Hang a Hay Net

Hay nets are often used while trailering to allow the horses to eat during the trip, or while at shows to keep hay in front of a difficult keeper. There are risks involved, however, with the large hoof-sized holes and the general ability of horses to get themselves into trouble, so hanging them safely is very important.

The easiest way to fill a hay net is to stretch the opening over the end of a bale rather than trying to wrestle individual flakes into the net one at a time. Once the net is full, pulling the drawstring closes the opening. Rather than wrestling with knots, the easiest way to keep the net shut is to pull the drawstring so that the knot sits against the rings of the hay net, holding them together. This also ensures that the knot will stay out of the way when you hang the net up.


Step two is to find somewhere to hang the net. Horse trailers often have welded loops set high in the trailer that are perfect for this purpose. In some cases, the bars on the trailer window have to suffice. In a stall, a hay net can be hung from a high bar (temporary show stalls usually have a bar that runs all the way around the top of the stall that is ideal for this) or through a screw-eye set high on a wooden wall. It's important to hang it from a high enough spot so that the bottom of the hay net will remain well out of reach of the horse's legs. Safety-wise, it's better to tie a hay net too high than too low. Aiming for wither-height or higher when hung should be safe. Once you have found a suitable spot, run the drawstring around the bar or through the loop and then pull the hay net up as high as it will go (it will slip down slightly as you tie it).


Keeping tension on the drawstring so that the hay net stays up, pull it down and hook it around a string near the bottom of the hay net. Pull the drawstring back up towards the top of the hay net, bringing the lower part of the net up with it.


Loop it back through the upper section of draw string...


 ...and tie a quick release knot to secure the hay net.


Flip the net around so that the quick release knot lies against the wall, away from the horse so that it is less likely to be accidentally untied by teeth.


This last photo illustrates why it's so important to double up the hay net by hooking the drawstring around a bottom string while hanging the net. As you add hay, the string diamonds that make up the net become wider, making the whole net shorter. As it empties, the diamonds end up with less and less width, making them longer until all of the string is hanging vertically when empty, making the net almost twice as long as when it's full. The doubled hay net will stay up high even when it's empty, while a non-doubled net hung at the same height will produce something like this red net, hanging dangerously close to the ground (both nets are the same size!):